
Setup a Bullseye Account as a Partner
| How to set up a client's account as a Bullseye Partner |
Requirements: You must be a Bullseye partner. To become a Bullseye partner, you need to sign up (you will be approved if you are with a marketing company or web developer who is providing Bullseye for a client). For information on become a Bullseye partner, see Bullseye Partners.
Set Up a New Account
After you login to your Bullseye account, you will see a screen similar to this:

To start, select Create Trial Account. You will see the following screen:

- Name: Enter the name of your client.
- Subdomain: This will become part of the URL of your client's locator. The name of the client is often entered.
- Email Address: This is not required. You may enter an email address of a person who will be managing the account, if your client will manage the account. After you enter the email address, an invitation will be sent to the email address to ask them to create a password so they can login. If you will be managing the account for your client, you can leave this blank.
- Countries to Activate: Select Add Other Countries if your client has locations in countries other than the United States. Then select the appropriate countries from the list.
- Mapping Options: Select the mapping options you want to use. See Bullseye's Guide to Mapping Options for more information.
After you enter this information, select Save. You will see a screen similar to the following:

Select the client you created to start configuring the account. After you select, you will be taken to this screen:

The various buttons will link to the corresponding section of the admin to take care of the applicable task, or to the appropriate documentation for further instruction. Links to documentation can also be accessed here:
Add Locations Manually via the Bullseye Admin
Add a Responsive Website Interface
Note that once you create the account, the account will be set up as a 14 day trial. If you set up an embeddable interface in the client's account, and put it on their website, that interface will remain on the site throughout the 14 day period. If you do not subscribe for your client within the 14 day period, the interface will become non-functional at the end of the trial period, but will be activated again once you subscribe for your client.
Clone an Account
If you have accounts created already in Bullseye, and need to add a new account, sometimes cloning an account can save some time. To do this, login to your Partner Account:

Select Clone Account. You will see the following screen:

By default, the categories, attributes, and search settings will be copied when you clone the account, though you will also have the option to edit these settings on the next page. Select Confirm:
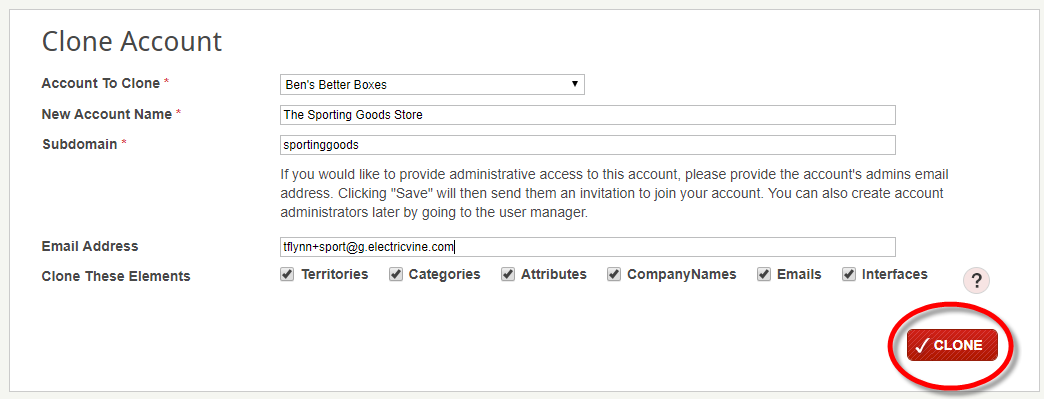
Account to Clone: Select the account you want to clone from the drop down list.
New Account Name: Enter the name of the client.
Subdomain: This will become part of the URL of your client's locator. The name of the client is often entered.
Email Address: This is not required. You may enter an email address of a person who will be managing the account, if your client will manage the account. After you enter the email address, an invitation will be sent to the email address asking them to create a password so they can login. If you will be managing the account for your client, you can leave this blank.
Clone The Elements: Simply select the items you want to keep from the original account when you clone.
Once you select ;Clone, the items you selected will be carried over into the new account and you can start working in the new account.
Set Up a Subscription
When your client is ready to subscribe, the subscription must be put on a credit card. You can enter your own credit card, or your client's credit card on their behalf. Some partners enter their own credit card information and bill the client outside of Bullseye, especially if they want to upcharge for the Bullseye service. If you want to pass the savings along to the client, you may prefer to enter the client's credit card with their permission. Clients you create will not have access to the Bullseye shopping cart, even if you give them access to the admin to maintain locations, view reports, etc. You must enter a credit card for each account separately.
To subscribe, select the correct account and go to Settings > Account > Plan. You will be taken to the shopping cart for that account:
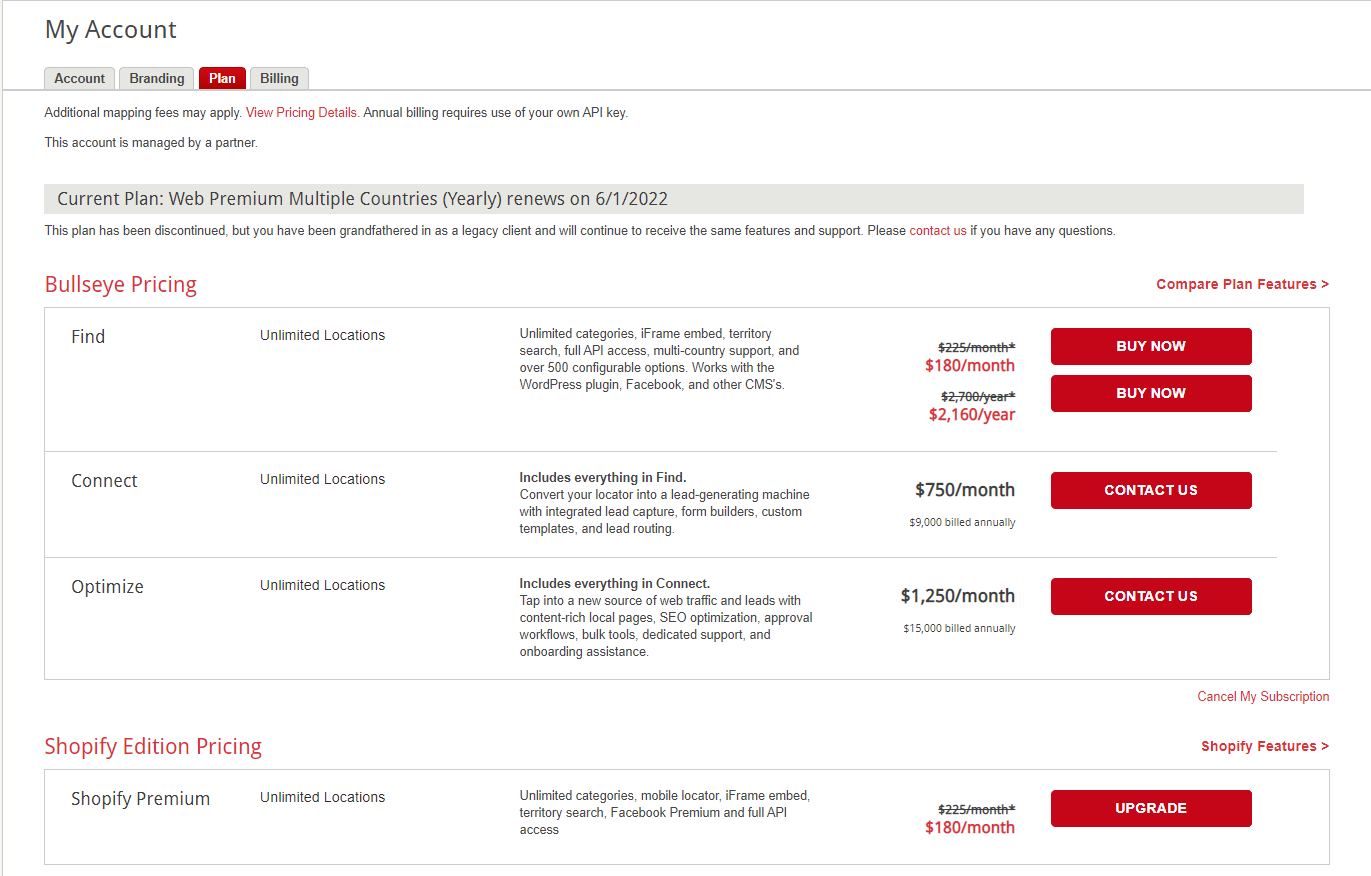
To subscribe, select ;Buy Now for the plan your client needs. The client will be charged the discounted amount since you are a Bullseye partner.
Use Account Groups to Organize your Bullseye Accounts
If you have a lot of clients that use Bullseye, you may organize them into groups to make management easier. You can also have parent groups with groups beneath them. To set up a group, go to Accounts > Groups as in the example below:

Once you select Groups, you'll see a screen similar to the following:

Select Add Group. You'll see the following:

Type in the name of the group. Select Save.
After you create the group, you can add accounts to the group. To add an account, select the Accounts tab, then Assign Accounts. You'll see a screen similar to the following:

Select the account that will be assigned to the group, then select Assign Selected.
You may also create a group and assign it to a parent group, if you need two levels of groups. To do this, first create the new group. After you create the group, select ;Edit. You will see an option to select a parent group. Select the parent group from the list, and select Save. You can assign accounts to the lower level group just as you do with the parent group.
Reports
When you login to your partner account, Bullseye provides a combined search report for all of your accounts:

By default, the line graph will display all the searches of your clients' web locators and Facebook locators. The web locators will be displayed in the red line, and Facebook locators will be displayed in the blue line. The total number of searches will be displayed in the graph. All your clients will be displayed beneath the graph in a table and you can see the number of searches for each client.
To go to each individual client account, go to the drop down menu on the top right, and select the correct client.
Users
When you login to your partner account and select the Users link in the left navigation, you can manage the users that pertain to your partner account. To add and manage users related to your client accounts, select the individual account from the drop down on the top right.
For more information on managing users, see the Users section.