
Create and Manage Territories
How to create and manage territories to allow users to search for locations that are assigned to strict geographic areas.
| Requirements: Any paid Subscription |
Also See: County Codes Search Types for Geographic Searces
Territory Overview
Our territory search provides granular search ability for companies who divide their distribution network or sales reps into strict geographic areas. For information on granularity on all types of geographic searches see Search types for Geographic Searches
Some companies assign their sales reps neatly into a group of counties. Others may have exceptions in their network, with some reps covering certain cities within a county, or other irregular configurations. Other companies have a hierarchical coverage structure that defines coverage at regional, state, and county levels. Bullseye is able to accommodate a lot of territory configurations to suit any need. In the US, you can create territories based on the following criteria:
- States
- Counties
- Cities
- Zip or Postal Code
- Combinations of the above options
For Canada, Bullseye allows you to arrange territories by provinces or postal code (3 character or 6 character). Territories are configured in the Bullseye admin (although you can call us if you'd like us to provide custom automation of territories). Locations must be assigned to territories in order for locations to be displayed in the search results.
Create a US Territory
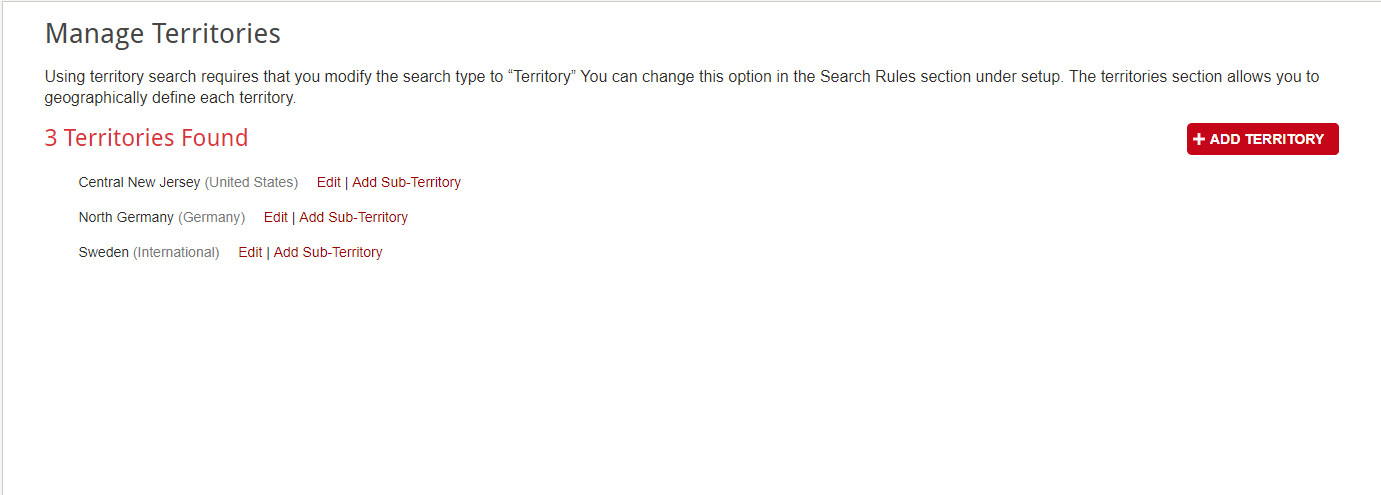
To access the territory tool go to Settings>Territories. You will be taken to the Manage Territories pages, where you will configure the geographic area of each territory, and the territory hierarchy if needed. To begin, select Add Territory. You will see a page that asks you to name the territory and select a parent if necessary (assuming other territories exist).
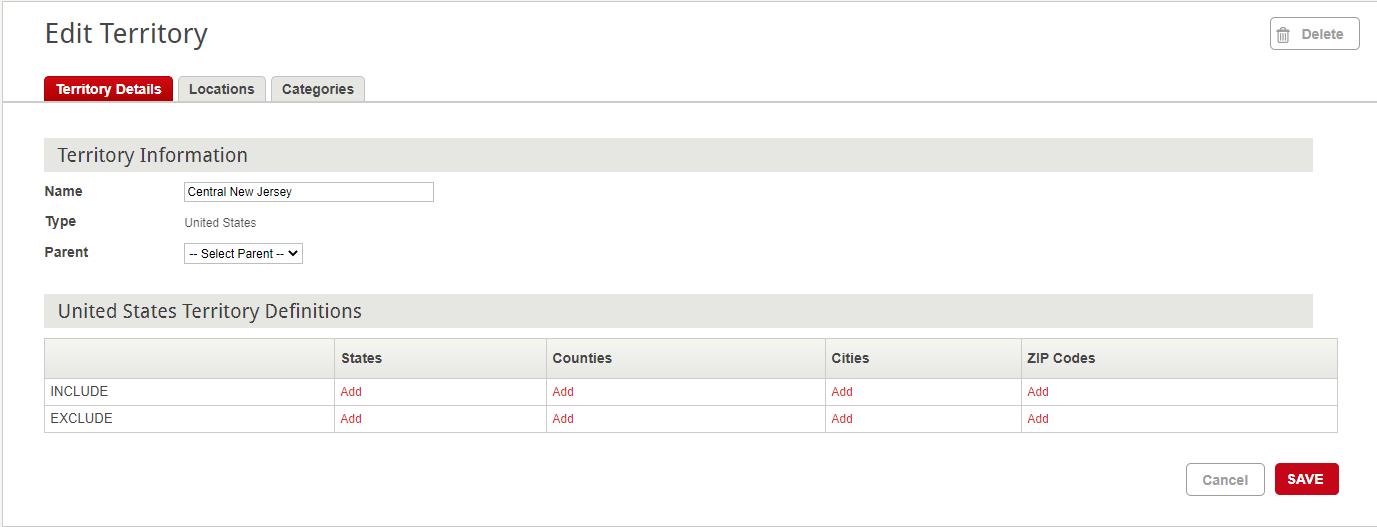
Often territories are named after the geographic area they cover (state, counties, etc.) or even the reps or locations that get assigned to them. In the example above, we name the territory Central New Jersey, and select "United States" as the type. This is our first territory, so there is no parent. We’ll go over creating territory hierarchies in more detail later.
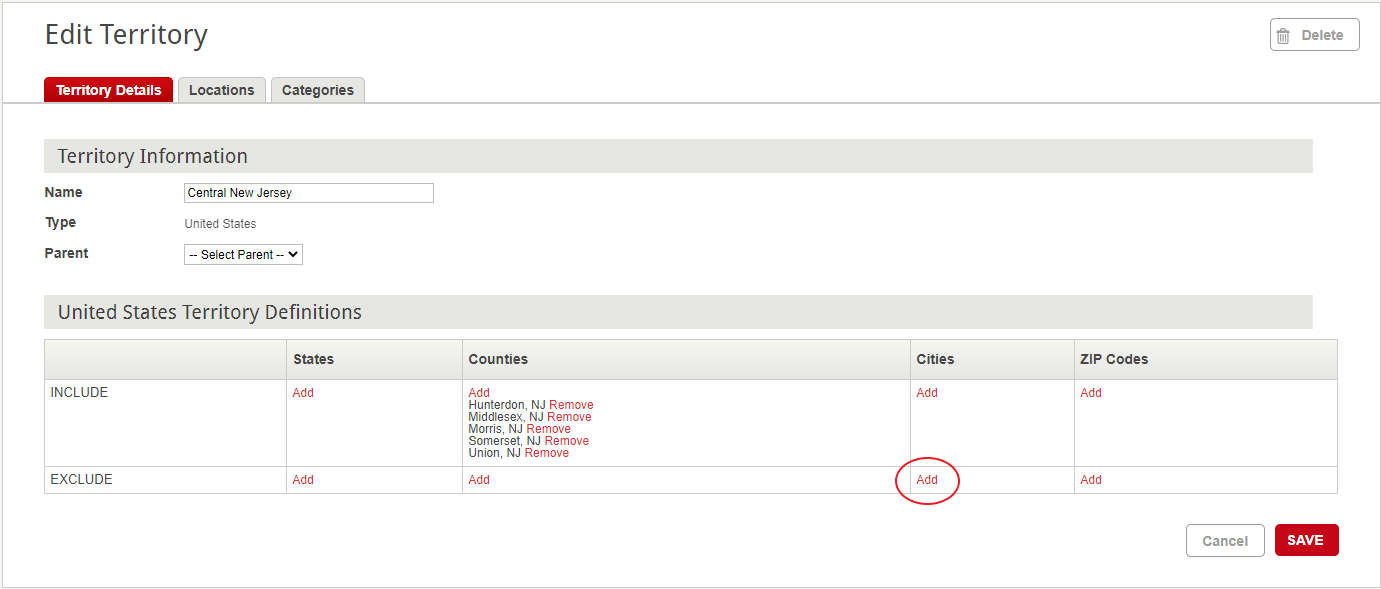
Notice that the choices are organized from large area to small area (state, county, cities, zip codes). In this example, we will assign 5 counties in central NJ to the territory. Under counties, select Add to the right of the include option. You will be asked to select a state. We will select NJ, and get this screen:

You will get a list of all the NJ counties. We will select Somerset, Union, Hunterdon, Middlesex, and Morris and then hit Save. You'll get a list of the counties you selected.
Great! We are almost done configuring our territory. In this example our rep that covers the territory serves all cities except for 2 in the extreme southern part of the area, so we will need to remove these from the territory. We just need to make a couple exceptions by removing 2 cities from Middlesex county. To do this, select Add under cities, to the right of exclude, as in the example:
You'll see a list of all cities in NJ. We are going to select Dunellen and Middlesex:

After you select the cities, hit Save. You will need to scroll down to the bottom of the page to access the save button.
Congratulations! You have just created a territory. Note that you can also assign territories to entire states (and make exceptions by counties or cities in a similar way). You can also create territories on a zip code level. Let's show an example of this by creating another territory:
Go to Settings>Territories and select Add Territory as you did previously. You'll be taken to the Manage Territory page where you can name the territory and choose the country. Let's name this territory after a sales rep named Ralph Singerman, and select the United States as the country. After you complete this, select Save.
You will be taken to the Edit Territory page where you can add your zip codes to the territory. In the Include row, select Add under Zip Codes. You will be taken to this screen:

You can enter zip codes directly into the direct input field. If you have a column of zip codes in an excel spreadsheet, you can paste the entire row, but make sure you have commas separating each zip code. 3 digit or 5 digit zip codes can be entered as needed. We provide a handy search option for zip codes by city/state if you know cities in your territory, but don't know the zip code. You can easily enter the city/state, and all the zips for the city will be displayed.
In this example, let's enter Lansing, Michigan under By Search. Type in Lansing next to City and select MI in the state drop down menu. Then select Search. Your screen should like like this:

Now, all you need to do is select each zip code by checking the check box next to each zip code. Then, select Save at the bottom, the zip codes for that city will be added to your territory.
Create a Canadian Territory
For Canadian territories, the process is more simple. As with US territories, start off by going to Settings>Territories. You can define territories by Province or Postal Code, using the same basic interface the US uses (but without cities or counties). Simply select the Provinces for your territory on the Edit Territory page by selecting Add under the Provinces heading, to the right of the Include option, then select Save.
If your territories are arranged by Postal Code, select Add under the Postal Codes heading, to the right of the Include option, then paste or enter your 3 or 6 digit postal codes (separated by commas) directly into the box. Then select Save.
Create a supported country territory other than the US or Canada.
Bullseye allows you to create granular territories for the countries that support granular territory search as indicated on the Search Types for Geographic Searches article in our Knowledgebase, assuming you’ve added the countries to your account. The screenshots below do not cover all the geographic terminology (some countries use Province instead of State, some countries use region, or county, etc.) In the UK, and Ireland, we support State, City or postcode area/postcode prefix.
To create a territory, go to Settings>Territories. You'll see Name and Type. Type in the name of the territory, select the appropriate country, and select Save. You'll see a screen similar to the following:

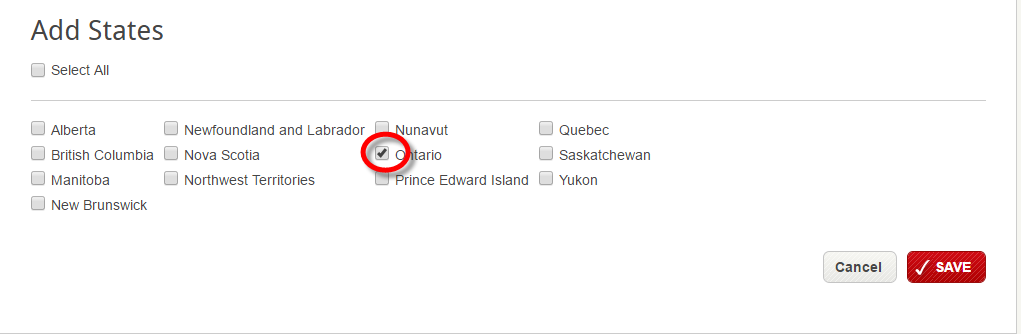
In this example, we'll create a State-based territory. Select Add under States and you'll get a list of the States in the Country:
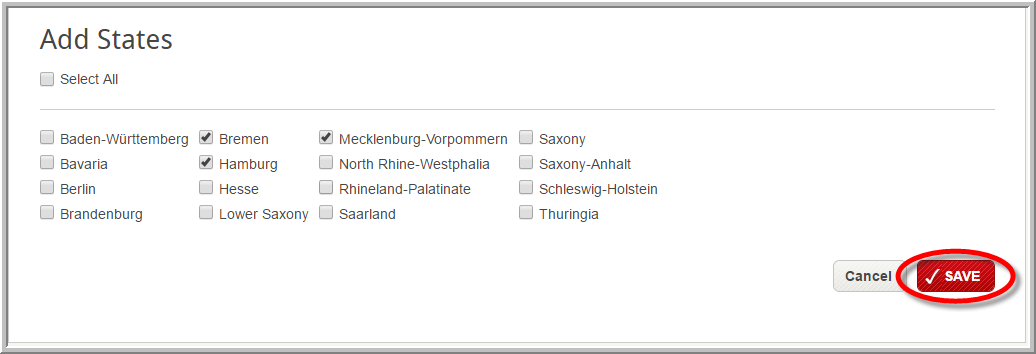
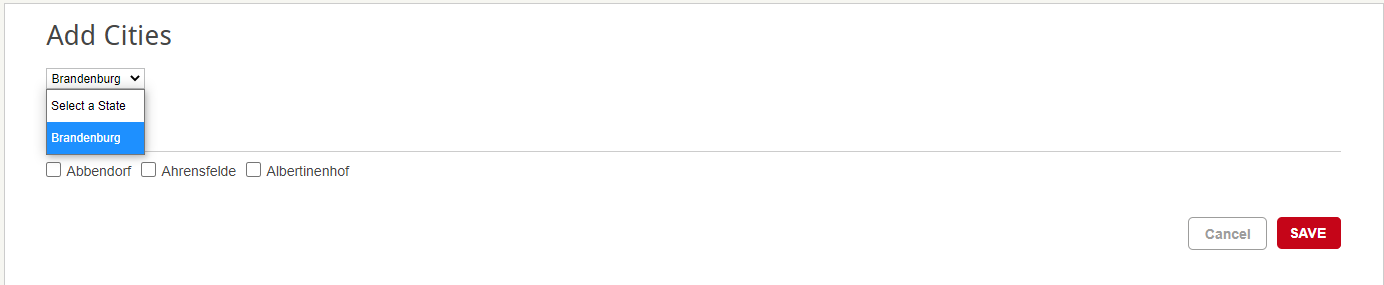
Select the States that apply, and select Save when you are done. If you have territories that require city level territories, note that you can check cities like you do with States. You will be prompted to select the State the city belongs to first. You can also create postal code level territories, like you can with US zip codes. See the US territory option above and view the screenshots to add a territory by zip code to view this. Adding Germany, Swiss, Austrian or Colombian postal codes works the same as adding US zip codes to territories.
Territory (State Only)
For some countries, we support State/Province level territories, as indicated in the “Territory (State Only)” column of the Search Types for Geographic Searches article.
Currently the interface allows you to add other data (county, postal code etc.) for certain countries when the Territory (State Only) option is selected. However, only States will be functional.
Create Other International Territories
International territories (territories for countries outside of US/Canada and other supported countries) have the capability to return search results within an entire country or group of countries. After you complete your International territory configuration, and assign your locations to the territories, your users will be able to select a country and see all of the locations in that country.
Note: By default, your Bullseye account will have the Other International region configured to return locations on a country level search basis. It is only necessary to set up territories for this region if you want to assign locations to multiple-country territories, or if you want to assign locations to territories outside of the country it resides in.
To configure an International territory, first go to Settings>Territories. On the Manage Territories page, select Add Territory. You will be taken to the Edit Territory page. Type in "Sweden" for the name of the territory, and select "International" next to the Type option. Then, select Add under the Countries heading. You will get an alphabetical listing of countries, the first page will show a list of countries starting with the letter A. At the top of the page, select the letter S. You will see this list:

Simply select the country Sweden and hit Save at the bottom. Simple as that.
Territory Hierarchy
It’s possible to create a territory hierarchy by establishing parent/child relationships between territories. This could be useful in a situation where a sales representative oversees a large territory that is broken down into smaller areas that are directly covered by other representatives. There is no limit to the number of levels a hierarchy can contain. There are two ways to create a hierarchical relationship - by adding a sub territory to a parent, or by selecting a parent on a territory to make it a sub territory. We’ll take a look at both methods. To configure a sub territory from a parent, first go to Settings>Territories. On the Manage Territories page you’ll see a list of your existing territories:
Click on Add Sub-Territory next to the territory you want to make a parent. In this example we’ll create a sub-territory under North Germany - click on Add Sub-Territory to the right of North Germany. Notice that North Germany is selected as the parent:

Give the sub-territory a name and click Save. Add states, cities, Postal code prefixes, and postal codes as described above. Note that only geographies that exist in the parent are available to add to sub-territories.
On the Manage Territories page, the hierarchy looks like this:

Click the “-” sign next to a hierarchy to collapse it. Click the “+” sign to expand a hierarchy.
In the next example we’ll add a parent to a territory in order to make it a sub territory. In this example we’ll create a sub territory of Sweden. On the Manage Territories page, click the Add Territory button. Give the territory a name and click on the Parent drop down. Select Sweden from the drop down list. Then, click Save.

Add states, cities, Postal code prefixes, and postal codes as described above. As noted before, only geographies that exist in the parent are available to add to sub-territories.
A few additional notes about territory hierarchies.
- Sub territories can only include geographical properties that are included in the parent. This rule is observed when a parent is assigned to a sub territory, a parent’s territory definitions are modified, or a sub territory’s definitions are modified.
- Locations and territory categories can be assigned to any level of a territory hierarchy.
- Locations and territory category assignments will not be made automatically to either parent or child territories. Assignment must be done explicitly to each territory.
- Sub territories must be the same type of territory as their parent, unless the parent is International.
When you click Save, you’ll see a popup in regard to these rules. Click OK to continue.
Assign a Territory to a Location
After you create your territory, you can assign locations to the territory in the same screen where you created the territory, by selecting the locations tab:

After you select the tab select Assign Locations. You'll see a popup similar to the following:
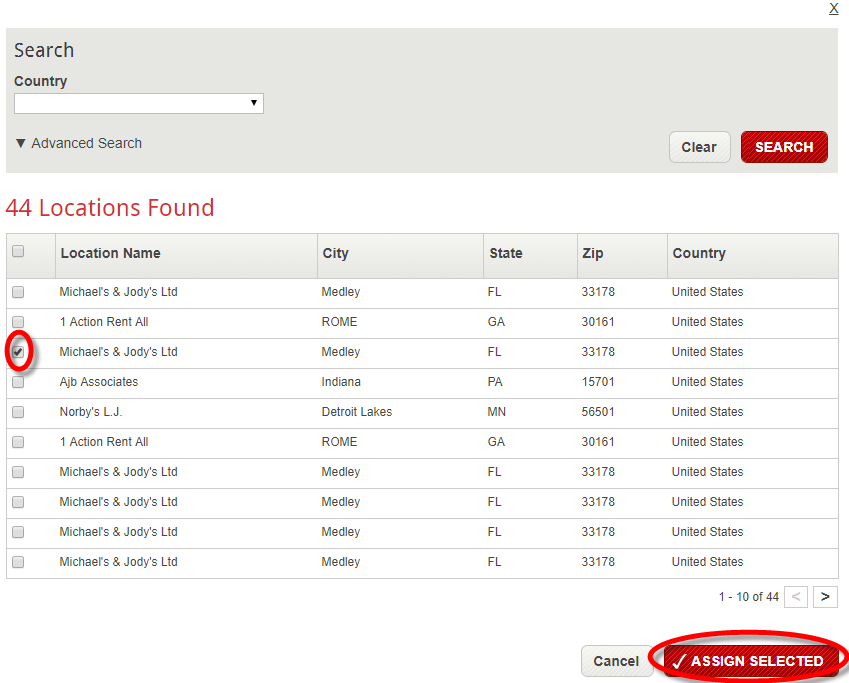
You'll be presented with a list of locations, and you can scroll through the locations by selecting the arrows at the bottom. You can also select the country search drop-down, and narrow down the search by address and city/state. Open the advanced search drop-down, and you can search by other criteria, including if they are active, 3rd party ID, Requires approval, Territory, Service (Lead Manager/Store Locator, and Keyword.
Once you have found the correct location(s) to assign, check them off and select the Assign button and they will be assigned.
You can also assign locations to territories by editing existing locations. Go to Manage Locations on the left navigation. Find the location you need to assign to a location by searching for the location by using the advanced search option, which will let you search alphabetically, or by city/state etc. Once you have found the correct location, select it from the search results. Then click on the Territories tab on the top. Then select Assign Locations. You will see the following screen:

Simply choose the correct territory from the list, then hit Assign Selected, then Save. That's all there is to it.