
How to Allow Users to Claim Listings
Add a link to location results to allow users to register in Bullseye and claim a location to manage.
| Requirements: Any paid subscription. |
The Claim Listing module allows Admins to configure interfaces to display a link on results that users can use to “claim” a location. When a user claims a location, they are added to Bullseye as a Location Admin and a request to allow them to manage the location is sent to Account Administrators.
There are a few steps to configuring and managing claims. In summary, you’ll need to:
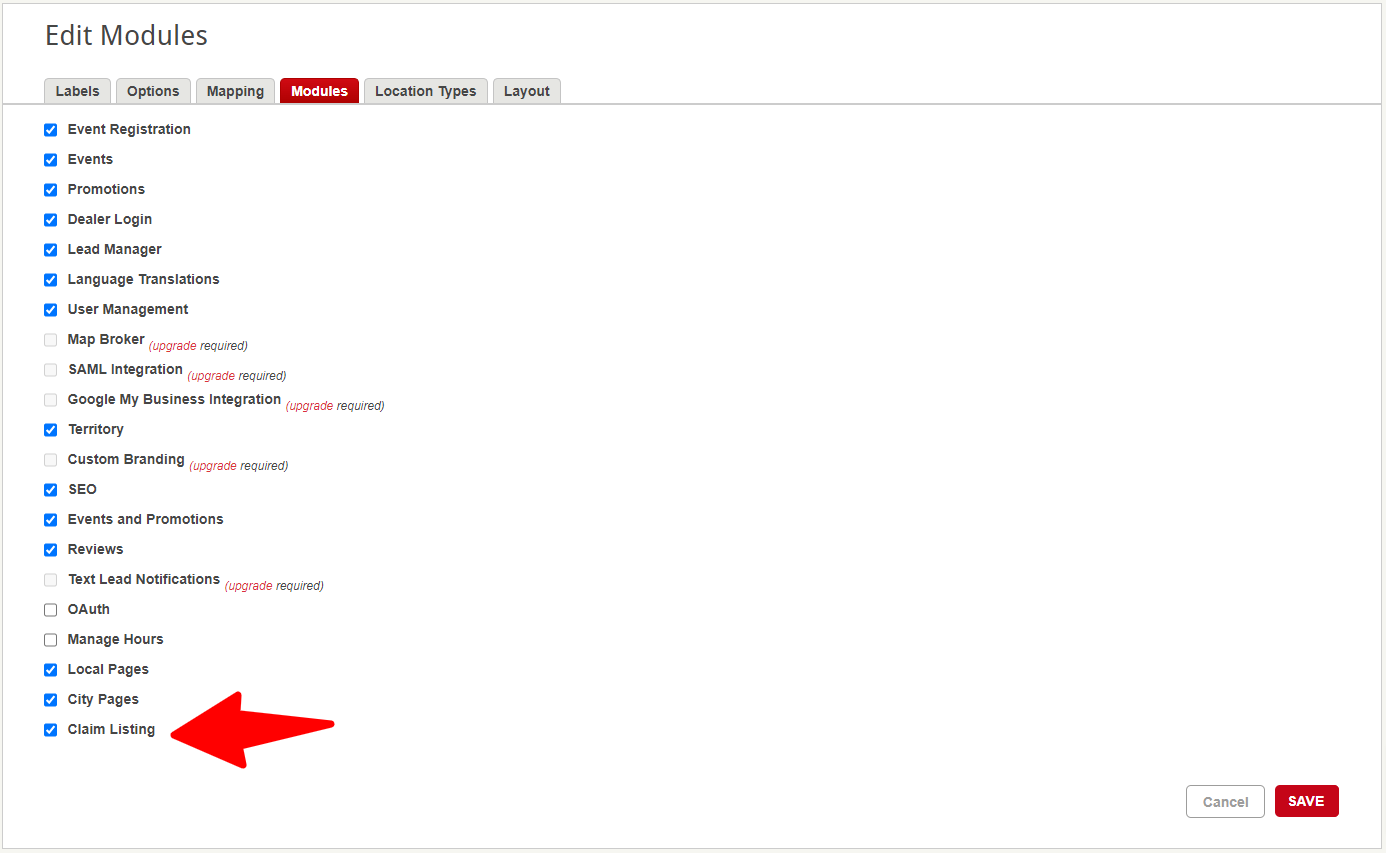
- Enable the Claim Listing module
- Enable an interface(s) to display the Claim List link
- Manage claims
- Configure Notification Options (optional)
- Configure User Permissions (optional)
Enable the Claim Listing module
To begin, enable the Claim Listing module from Settings > Setup.
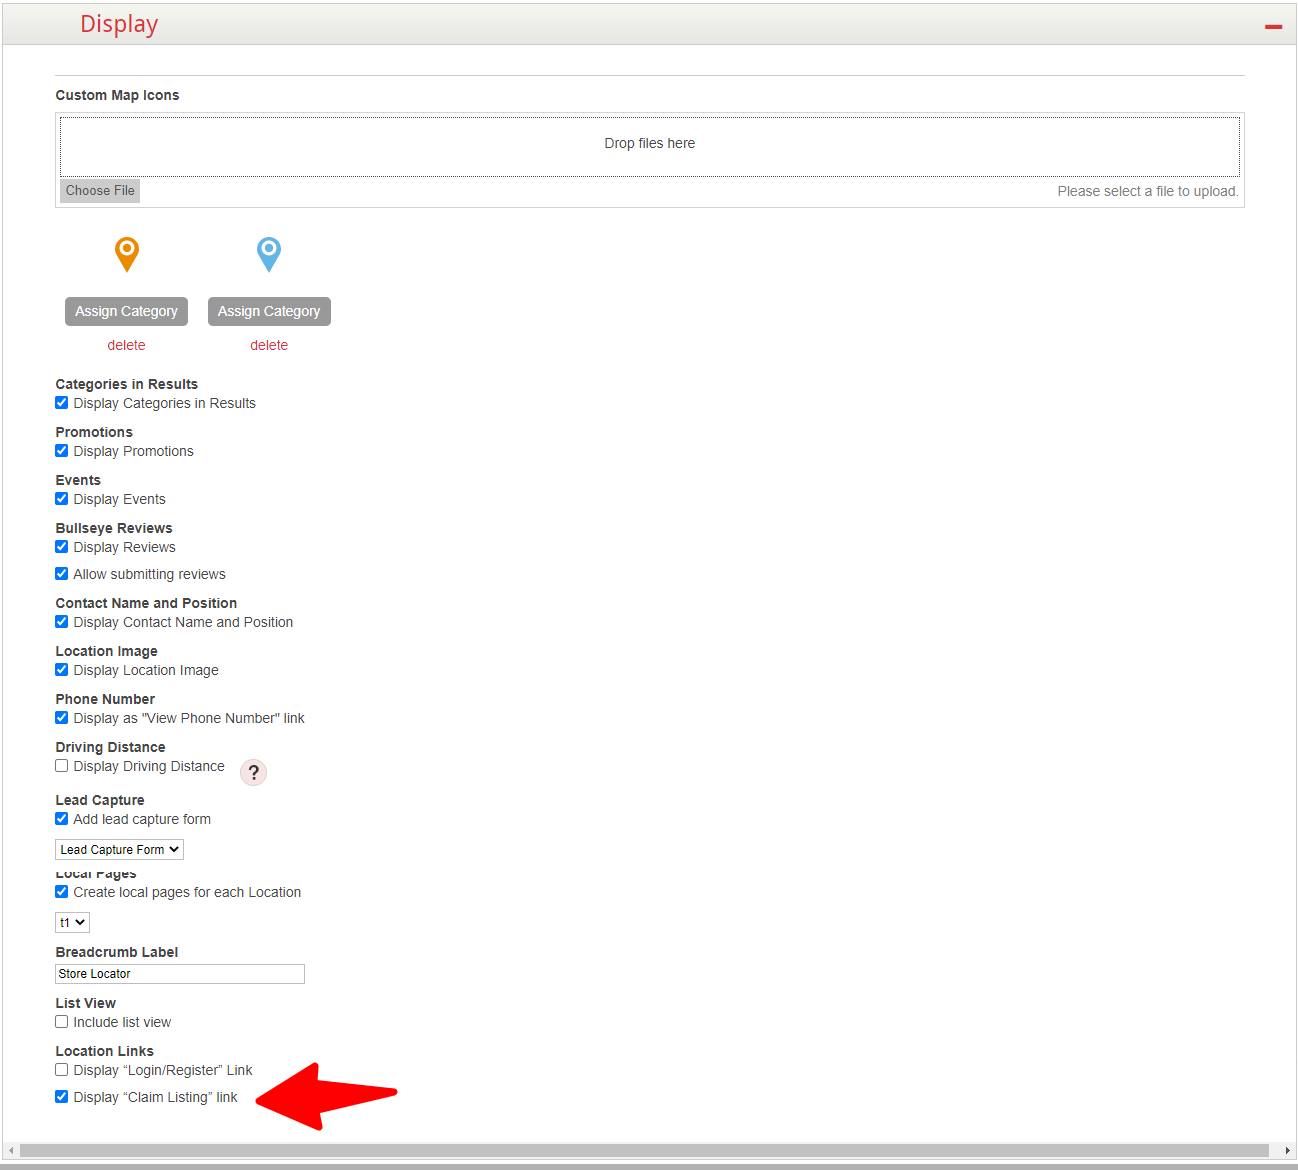
Enable an Interface(s) to Display a Claim Listing Link
On the interface, expand the Display accordion, then enable the Display “Claim Listing” Link option.
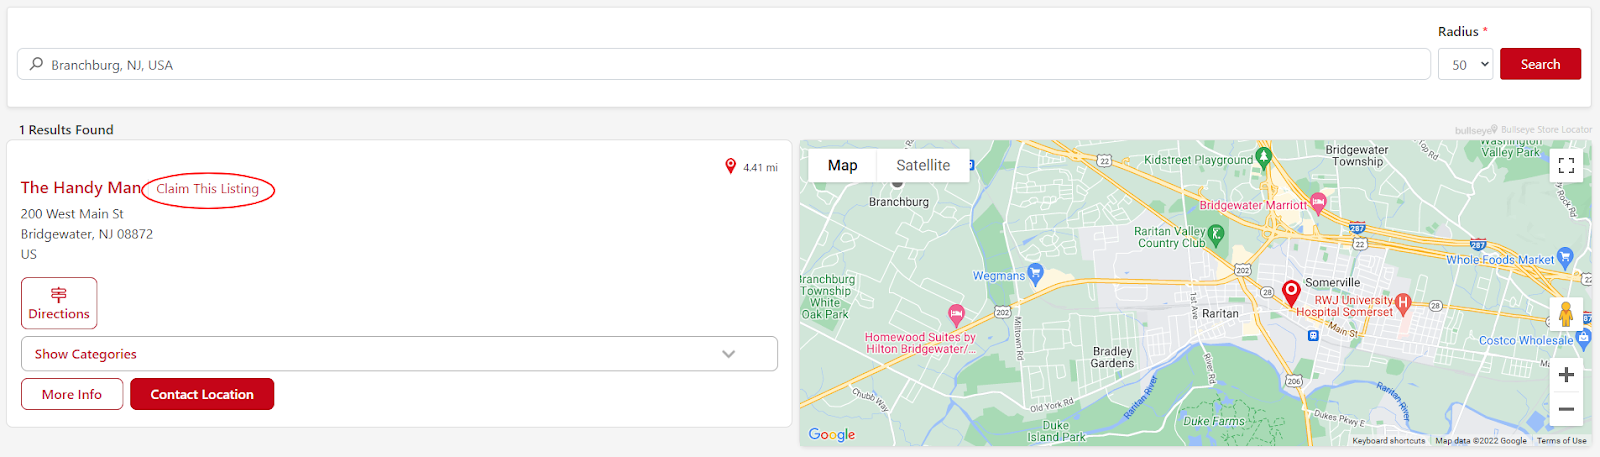
On the interface, you’ll see the link on each search result:
When users click this link a registration form will open. The user must enter their First and Last Name and create a password. If they already have an account in Bullseye, they can click the Log In link below the form.
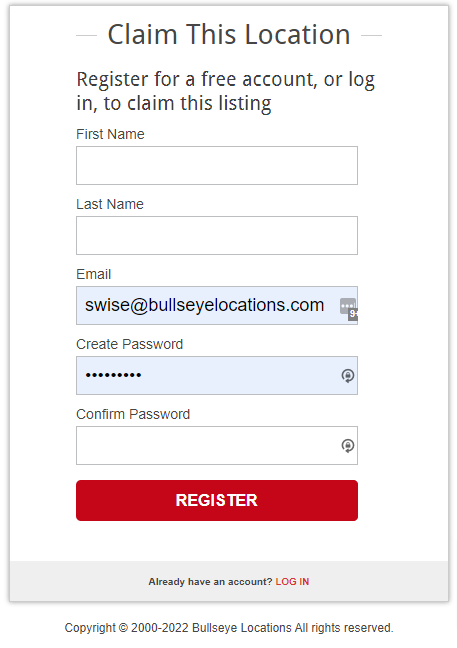
Once the user completes the registration form and clicks on Register, they will receive an email confirming their registration and providing a link to activate their account.
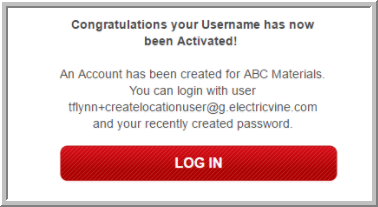
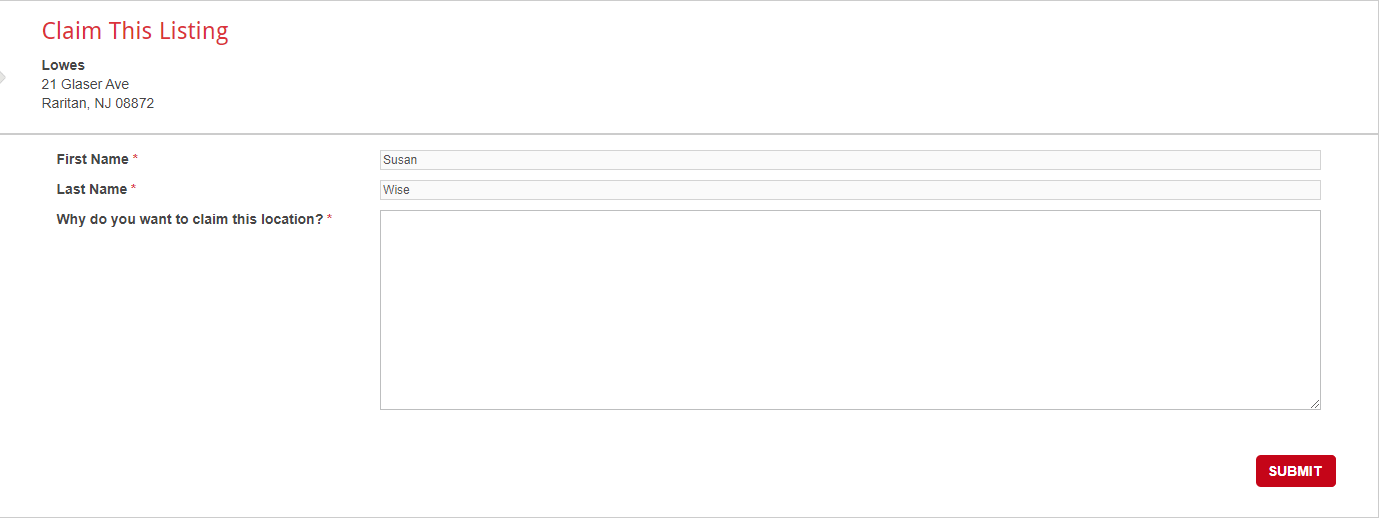
When they activate their account, they’re created in the account as a Location Admin with a pending location assignment. When the user first logs in to their account with their credentials, they’ll see a claim form that they need to submit to create the claim.
Manage Claims
Pending claims can be managed by navigating to Users > Location Claims from the main menu. Claims can be approved or rejected here using the links next to each claim. The user that claimed the location will be notified in either case.
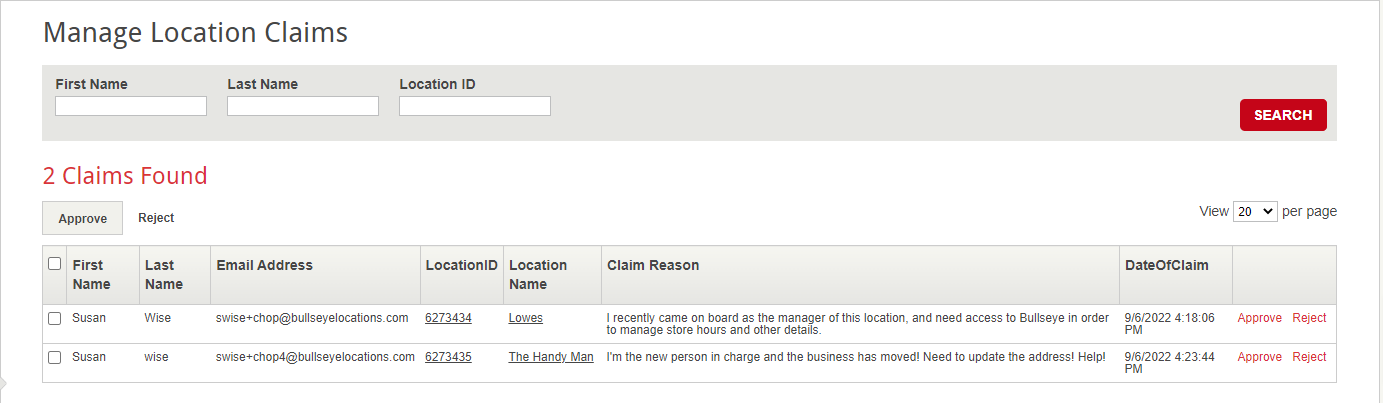
If the claim is approved, the user will see and be able to manage the location the next time they log in.
Configure Notification Options (optional)
By default, the option to Receive Email Notification on Location Claim Request is enabled. When this is enabled, Account Administrators will be notified of each claim request. If you don’t want to receive notifications, and would rather log in periodically to review pending claims, you can disable this option 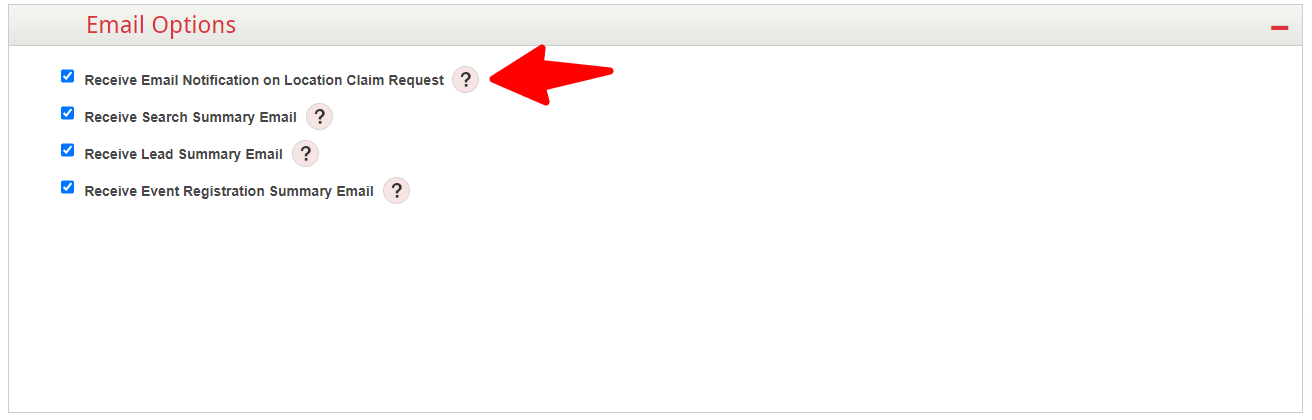
Configure User Permissions (requires User Manager)
Each default role has a predefined set of permissions that govern what functionality is available to the user (To learn more about default roles see Reference for Allotted Permissions). By default Location Admins have permission to Add, Modify, and Delete locations. If you want to prevent a Location Admin from creating new locations, you can modify the role’s permission and disable the permission to add locations.
Modify a role’s access by selecting Users > Roles. When you arrive at the Manage Roles page you will see the default Bullseye roles. Default roles, with the exception of the Administrator role, can be modified by selecting the Edit option next to the role if you have a User Management subscription. To remove permission to add locations, click on the Permission tab, locate the row for Locations, and disable the Add permission checkbox. Click Save when you’re done.

You may also consider whether you want Location Admins to be able to delete their location. If not, simply disable the Delete permission checkbox as well.