
Using Enhanced Local Pages
| Requirements: Available in Connect and Optimize subscriptions, and as an add-on to the Find Subscription. |
- Add locations
- Add a Master Record
- Configure a Local Page Template
- Configure an Interface to use enhanced Local Pages
Add Locations
See How to Add Locations Manually Through the Admin for more information on adding locations. Remember to turn on Lead Service on the location if you want to display a lead form on the Local pages (requires a Lead Manager subscription)
Master Records
Master Records are a special type of location. They are not returned in search results or listed in any other place where a list of locations is displayed. They can't be assigned to categories or territories, or be managed with the Bulk Update or Managed Hours tools. However, they look very much like a regular location. The main difference is that Master Records do not have any geographical information associated with them; you'll notice that the Address fields are grayed out and can't be edited.
To add and Master Record navigate to Interfaces > Local Pages > Master Records and click the Add New Record button. To edit one, click the Edit link next to the Master Record name.
 Master Records look a lot like regular locations. Here's what the Master Record detail page looks like.
 Master Records provide default information to local pages. In the event a location doesn't have certain information, a Master Record can provide it so that local pages look complete and have useful information. An example of how Master Records can be used is Hours. You can provide the business default hours on the master record, so that if a location doesn't enter their own hours, the default hours will appear on the local page.
There's a difference in the About attribute on Master Records as well. On Master Records merge tags are available to use to pull location-specific information into the About content in order to make each landing page unique. We support [City], [State], [Country], and [LocationName] - please note that merge tags are case-sensitive and must be entered exactly as shown. The location name will always appear in the heading, but you can use the merge tag to add it to the content too. For example, you might enter something like "[LocationName] is the premier roofing installer in [City]. Visit our website to find other qualified installers in [State] and the [Country]."

Now, let's move on to Local Page templates...
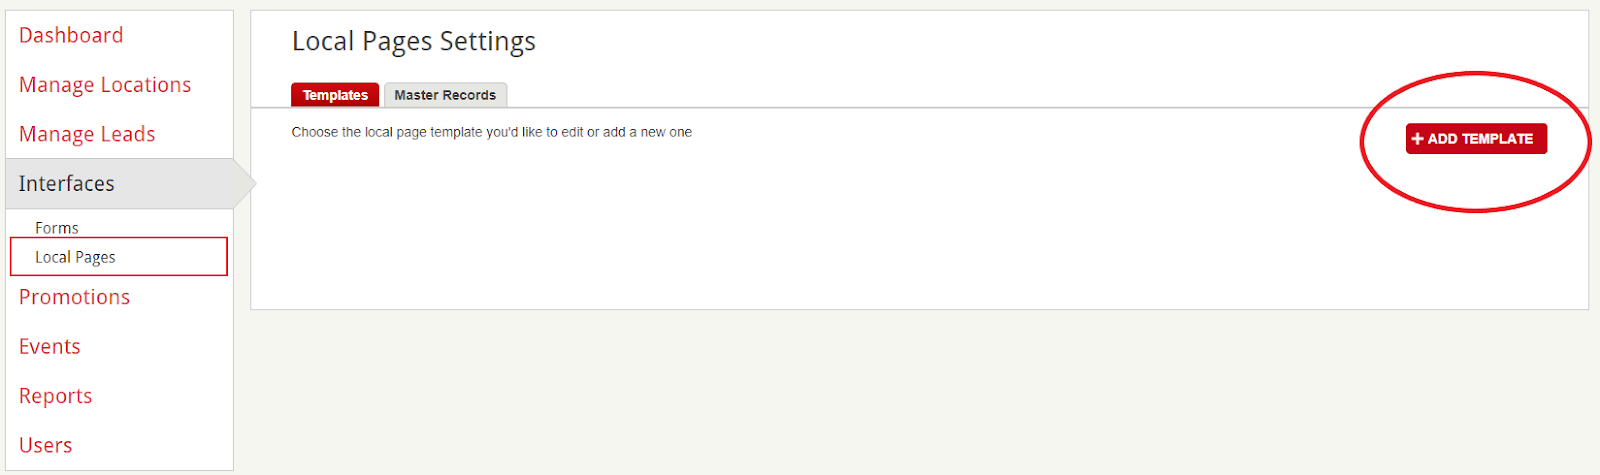
Local Page Templates
If this is your first landing page click on the Add Template button to launch the Local Page Builder:
Select a template. Each template has subtle differences in layout, like right or left sidebars. You can preview the selected template in the right-hand preview pane. Click Save and enter a name for the template.
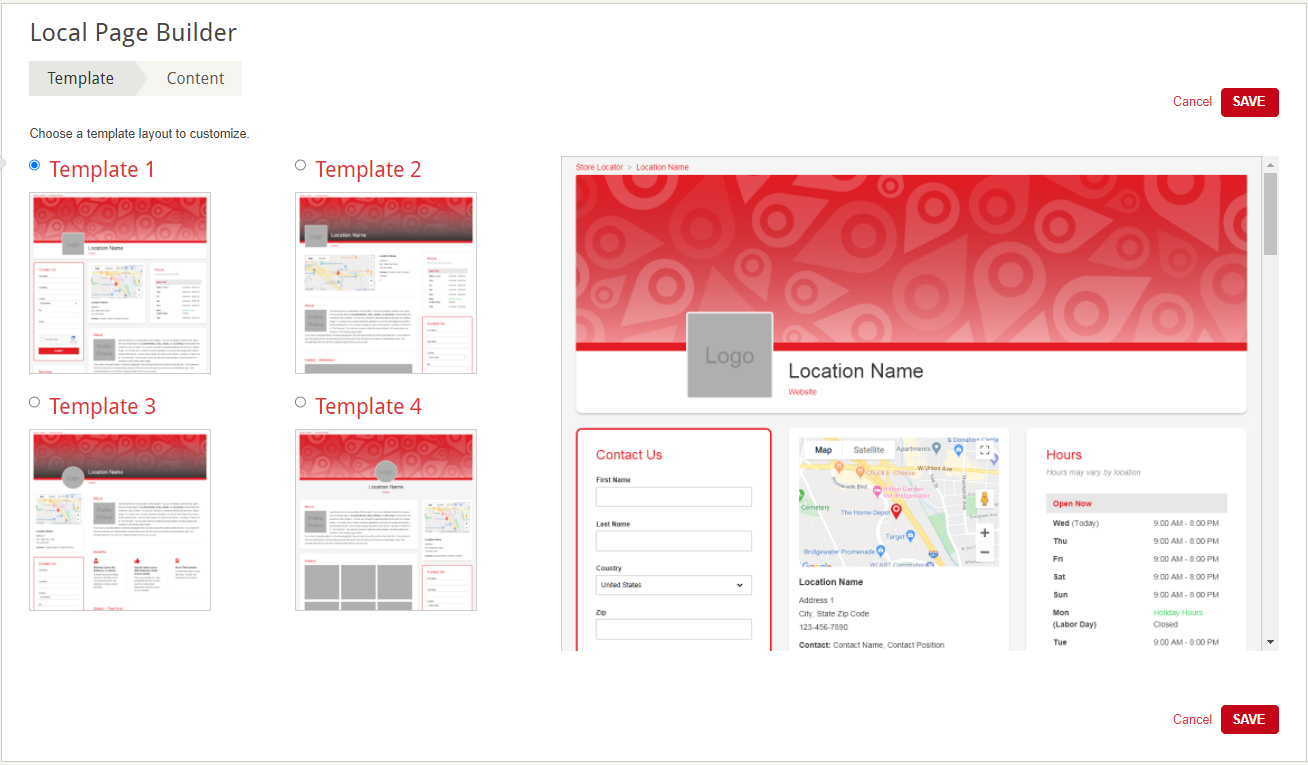
After you've selected a template and saved it, navigate to the Content tab by clicking the drop-down arrow next to the Save button and selecting Save and Next. Alternatively, use the breadcrumbs at the top left of the builder to navigate between the Template and Content tabs.
A Master Record is required to provide the default content for local pages in the event that the location doesn't have certain details. If you don't link a landing page template with a master record, local pages will only display the details that the locations have available, and may therefore be much simpler and provide limited information. If you don't have any Master Records available, you'll see a popup to create one. Click Add Master Record to create a Master Record, or click Add Later to continue configuring the Landing Page Template. Or select a Master Record like the one created in the previous step.

The Content page of the local page builder lists all of the types of content blocks that can be displayed on local pages. Some elements, like the map, location information like the address, banner, logo, and about content can't be turned off or hidden on the landing page, and these elements will always use information from the locations. All other elements are optional to display, and can be turned on or off by checking or unchecking the checkbox next to the option.


Let's take a look at each option more closely.
- Master Record: Select a Master Record to configure default information that will display on local pages in the event a location doesn't have that information. If you don't select a Master Record, only the information available from a location will be displayed.
- Map: The map is required, but you can select whether to use a static map to improve page load speed, or a dynamic map that can be manipulated (moved and zoomed) by users.
- Location Information: Local information is required and will always use the information available from a location.
- Banner: The uploaded image will be resized to fit in the display area of the local page. The recommended dimensions are 1200x300 px.
- Logo: The uploaded image will be resized to fit in the display area of the local page. The recommended dimensions are 150x150 px.
- About: The field supports HTML, Javascript, and merge tags. Merge tags pull location specific fields into default content. You can use the following merge tags in the About field - [City], [State], [Country], and [Location Name]
- Nearby Locations: Select this option to display the 3 nearest locations to the selected location. Internet locations are excluded.
- Breadcrumbs: Select this option to display the breadcrumb path to the local page.
- Directions: Select this option to display a link to Directions via Google Maps.
- Contact Info: Select whether to display an Email Address, Website, and/or Phone Number. These fields will use the location's information if there is any. If not, it will use information from the Master Record if it has been provided. If not information is provided on the location or Master Record the fields will be hidden.
- Profile Image: Select this option to display the Results Thumbnail from a location or Master Record.
- Store Hours: Select this option to display Business Hours from a location or Master Record.
- Lead Form: Select this option to display a lead form. The location must be in the lead manager services, and the interface must be configured to display a lead form.
- Category Groups: Select this option to display a group of categories. The default category groups "Service" and "Certifications" are automatically created with a Local Pages subscription. You can create additional category groups at Settings > Categories. You can select any 2 category groups to display on the local pages using the drop-down selectors. See Working with Category Groups for more information
- Custom HTML: Select one of the Custom HTML options to add custom HTML content to either the sidebar or main body of local pages.
- Events: Select this option to display up to 3 upcoming events on local pages. If the account has events, the first 3 upcoming events will be displayed.
- Testimonials: Select this option to display up to 2 Testimonials from a location or Master Record. The Testimonials complex attribute is automatically created with a Local Pages subscription. See Working with Complex Attributes for more information about how to edit complex attributes.
- Benefits: Select this option to add up to 3 Benefits. To create a Benefit, see the Create a Benefit Section below
- Gallery Images: Select this option to display the Local Page Photos from a location or Master Record.
- Promotions: Select this option to display up to 3 upcoming Promotions on local pages. If the account has Promotions, the first 3 upcoming events will be displayed.
- Reviews: Select this option to display Reviews. The account must be configured with a Reviews option, and the location must configured to display reviews. See Bullseye Reviews for more information on configuring Reviews.
- Social Media: Select from Facebook, Twitter, LinkedIn, Instagram, Pinterest, and/or Yelp to display social media links on landing pages. Social media icons will only display for any social media profile configured on the location or Master Record.
- Videos: Select this option to display up to 3 videos from a location or Master Record. The Videos complex attribute is automatically created with a Local Pages subscription. See Working with Complex Attributes for more information about how to edit complex attributes.
- Documents: Select this option to display up to 3 pdf documents on local pages from a location or Master Record. Three Document attributes are automatically created with a Local Page subscription.
Create Benefits
Enable the Benefits option in the Local Page Builder, then click the Add Benefit button
 You'll see the following popup:
 Select an icon to display above the Benefit, then enter a title and a description. Click Save to save the Benefit. To create another, click the Add Benefit button again and repeat the steps. You can create up to 3 Benefits.
Configure an Interface
If you haven't created an interface yet, here's a guide to add the Map on Top or Map on Side interface to your account.
Once you have an interface, edit it and navigate to the Display tab. Enable the Create local pages for each location option, and select a local page template from the drop-down. Remember to enable Reviews and add a lead form if you want the lead form and/or reviews to be displayed on the local pages of locations that have Lead service or have Reviews enabled.

That's it! Now that you've added locations and a master record, configured a local page template, and configured an interface to use enhanced local pages, you're done! View your interface and click More Info on a result to see the local page.